
Try This: Plastic Fusion
If you haven’t been using your reusable totes lately, you may find that you have saved up a whole bunch of plastic bags, possibly more than you could ever use on a year’s worth of dog walks! Did you know you can repurpose those plastic bags into something new by laminating thin layers with heat and pressure?
Here’s what you need:
- A clothes iron
- Thermoplastic, such as plastic shopping bags, trash bags, even old disposable plastic table covers
- Paper, parchment paper works best
- Cardboard
Helpful optional materials include:
- A ruler
- Wooden stick
- A board
- Ballpoint pen
- Permanent marker
Here’s what to do:
1. Make sure the iron is empty of water. Steam won't help with plastic fusion, but is an easy way to get a nasty burn.
2. Prepare an area by laying down cardboard on a firm, flat, heat-resistant surface. Never iron over glass! If the surface is getting too hot underneath the cardboard, try adding another layer or finding a safer spot.
3. After a space is set up, warm up the iron. Be sure to set it where nothing can accidentally touch the warm metal. Set the temperature to its lowest steam setting (but don’t use water) for bags, or slightly higher for table covers. Setting the iron too low will not make the plastic melt together, too high will make the plastic hard to work, more on that later.
4. Prepare your materials. Make sure you have an even number of layers of plastic over the entire area that you are fusing together. For plastic bags that means cutting them to where they will fold flat. Use scissors to cut the seams and open the plastic bag. Avoid cutting any pieces off, this wastes plastic.
For shopping bags, 6-8 layers is a good starting point. Like the iron temperature, having too many layers will not allow enough heat to reach the middle, and too few layers will overheat rapidly.
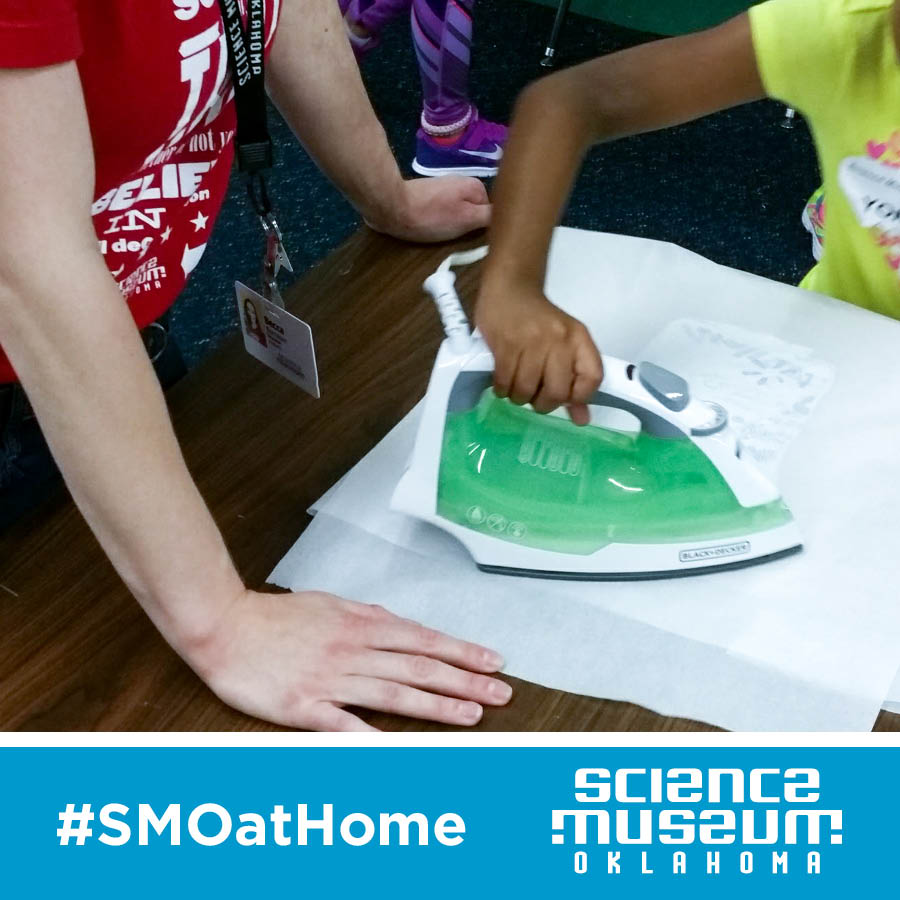
5. It's time to iron! Always make sure you have a high-temperature, non-stick barrier between your iron and the plastic. Parchment paper works best, but other paper works too, as long as it's not wax paper. If you use paper thicker than parchment paper, you might have to raise the iron's temperature, but test it out first.
If the metal of the bare iron touches the plastic, it will stick and have to be scraped off. If your iron has a non-stick coating, be sure not to scrape it with metal to avoid damaging the coating.
Slowly move the iron across the area where the plastic is under the parchment paper. The hottest part of the iron is the center of the soleplate on bottom, so make sure the middle of the iron gets all the way out to the edges of the plastic you're fusing. Be careful not to stop in any one spot, or you could overheat the plastic. Try to spread the heat evenly.
6. The only way to tell how well the plastic is melting together is to check. Put the iron back in a safe place, and allow the plastic to cool for a couple of seconds. You might hear crinkling as the plastic shrinks while it cools. Peel the parchment paper off the top and flip the plastic. The edges will most likely cool first.
Helpful hint: Sticks are good for any poking, holding, or prying. Sticks provide a way to check on things without getting burned. Flat sticks work well to do all this, so we suggest a tongue depressor or craft stick.
To see how well the plastic is melting together, check for gaps and bubbles. Large bubbles in the surface indicate that the plastic is less melted together, Smaller bubbles or ripples indicates that it is more melted together.
If you start to see holes through layers of plastic that means too much heat has been applied there.
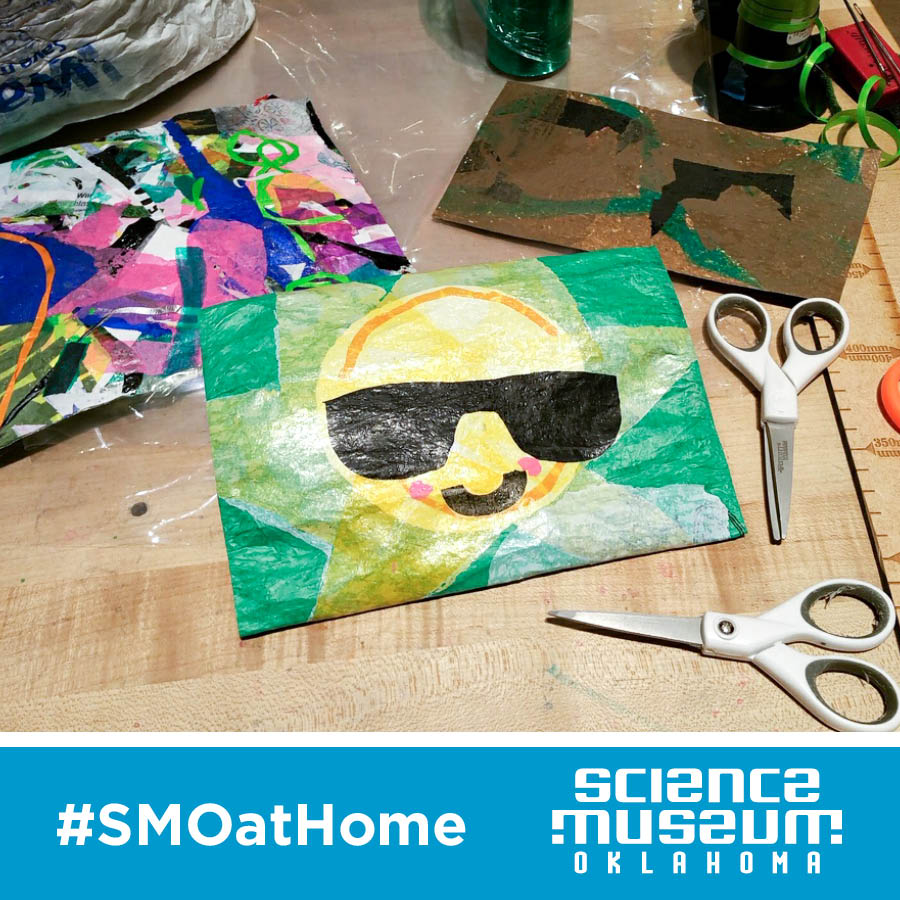
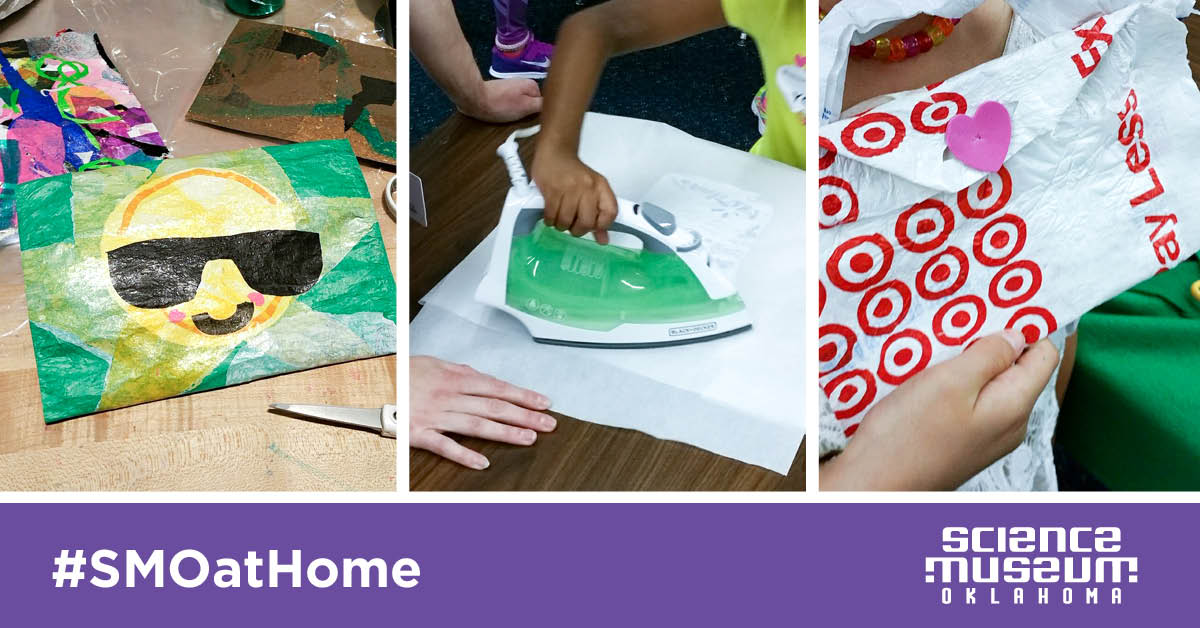
A special note on shopping bags: As they melt together the print from the middle layers will start to be more visible from the top, which can be seen through translucent parchment paper.
There are lots of little cues that we can pick up that can tell us how well the plastic is fusing together.
7. To ensure the plastic is thoroughly fused, iron one side and check it, then flip and do the reverse, and repeat until it feels thicker and strong. Once the plastic has been ironed enough, the sheet of laminated plastic can be cut with sharp scissors, decorated, fused to other pieces, or sewn.
A note on safety:
Providing one is careful to avoid steam or shattered glass, risk of serious injury is relatively low in this project. The molten plastic won't stick to skin, but the iron will be hot enough to cause pain, redness, and swelling. In the event you touch skin to your iron, running the affected area under cool running water (no ice) will relieve discomfort and reduce swelling. So take it easy, but always know where your iron and cord are to prevent accidents!
Take this activity further:
Add some color!
The plastic is very slick, but some ballpoint pens and permanent markers can be used to draw on it. Test on a scrap to see what works. A pen and a ruler can be used to assist in advanced designs.
Try using pieces of different colored bags or printed bags to layer into neat designs! Try incorporating clear plastic from bags to add windows or translucency. Thin layers will shrivel, so if you want to make sharp edges on your design, first fuse a larger piece with that color on top, then cut out the shape you want from it.
Make it 3D!
Folding a flat piece will allow you to make a pouch, or fold unevenly to make a flap for the top. The edges can be melted shut or sewn. If fusing the seams, allow extra time for the heat to soak through all those layers, and extra time to cool. Using a board with a straight edge will help you slide the iron along only the edge you want to melt together, and protect the rest of the pouch from melting flat. Can you make a wallet with a fused design on the front, or a bag with a button flap and a shoulder strap?
What’s happening?
There are basically two main kinds of polymers, one that melts with heat, and the other that does not. Rubber and silicone do not, whereas nylon or polyester do. Plastics that melt with heat are called thermoplastics, and are easy to recycle even with clothes irons as we are.
The most common kind of plastic in plastic bags is polyethylene. It melts easily at a low temperature, is easy to form, and releases very little odor. Those properties and its availability is why we suggest it for plastic fusion.
As we recycle the plastic through the process of melting, it is slowly degrading. This process will make it harder and harder to stick together. As a result thermoplastics, though they can be recycled, have a limited lifespan before they have to be industrially reprocessed. Since reprocessing is more expensive to do than simply making new plastic, it is not usually done.
Remember: Reduce, then Reuse, then Recycle.