Water Cycle in a Bag
Emily from the SMO programs team loves rain and knows it’s just one step on a larger process called the water cycle! The water cycle is the path water follows as it moves from the surface of the earth up into the atmosphere and back to the ground again.
Emily from the SMO programs team loves rain and knows it’s just one step on a larger process called the water cycle! The water cycle is the path water follows as it moves from the surface of the earth up into the atmosphere and back to the ground again.
There are four steps to the water cycle. You probably know them or have heard of them:
Let’s start with evaporation. During evaporation, heat from the sun cases water to turn to a gas called water vapor. This gas rises into the atmosphere. As the water rises higher into the air, it cools down and turns back down and forms clouds. We call this cloud-forming step condensation.
When the clouds become too saturated with water and the water becomes too big and heavy for the air to hold up any longer, gravity will pull that water to the ground in a step called precipitation.
Rain, hail, sleet, drizzle, and even snow are all forms of precipitation. After the rain, or other form of precipitation falls to the ground, it collects in ground, ponds, lakes, rivers, oceans and other bodies of water. You guessed it, this step of the water cycle is called collection.
These four steps then repeat in the water cycle — and with just a window, some water, and a resealable bag, you can create your own water cycle!
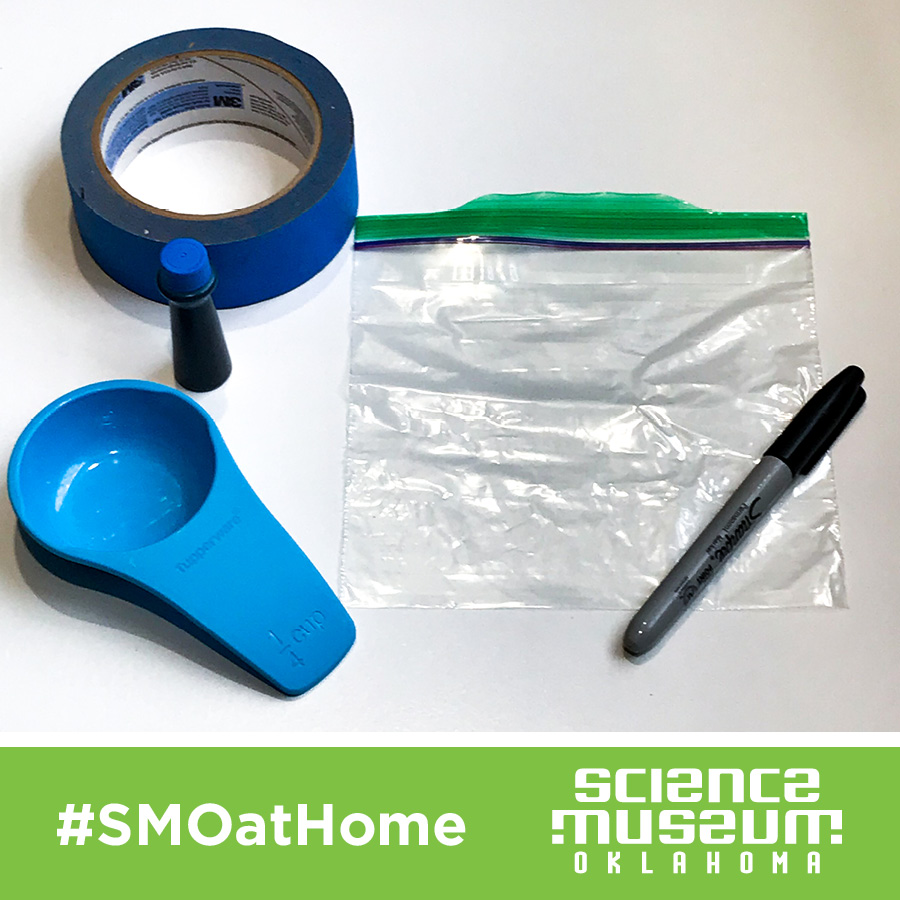
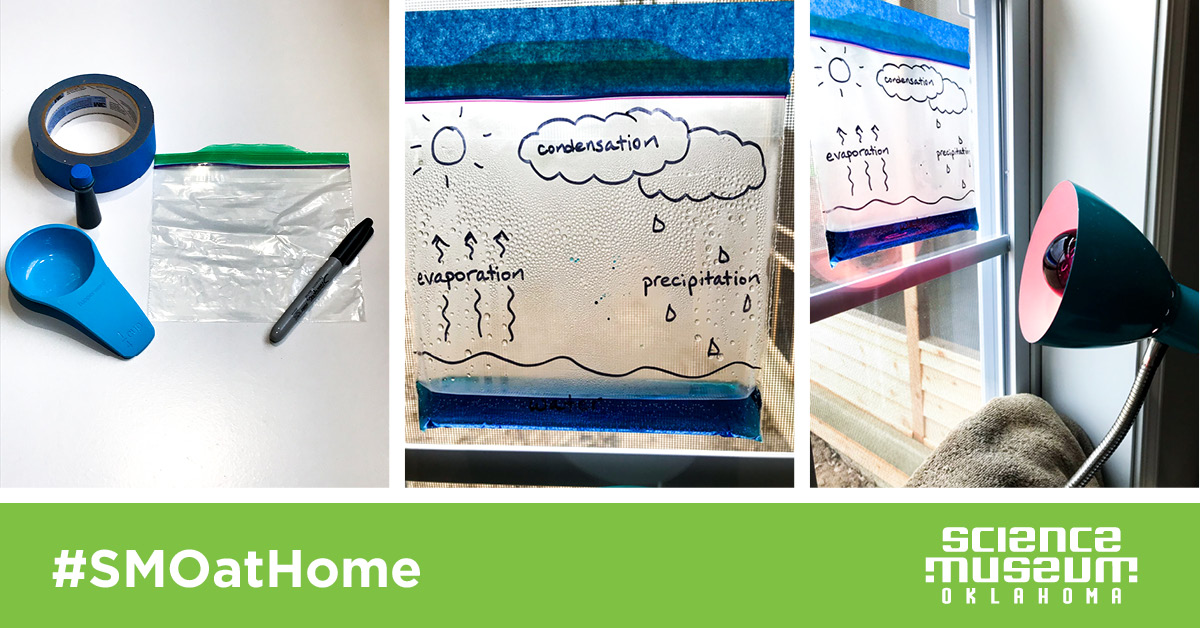
Here’s what you need:
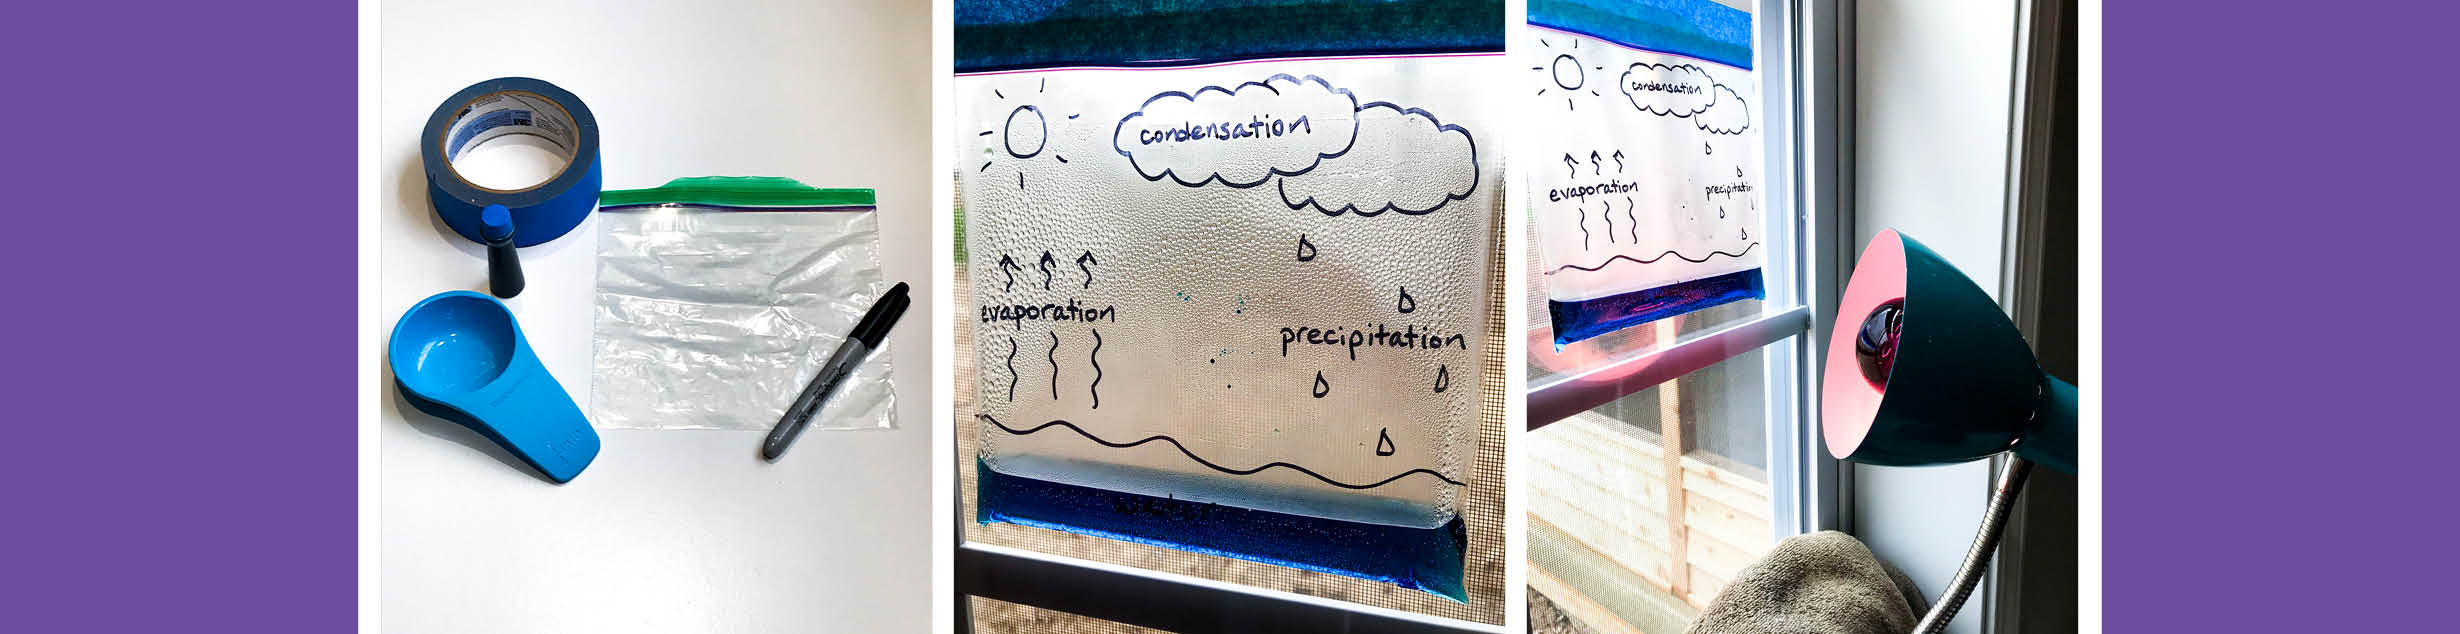
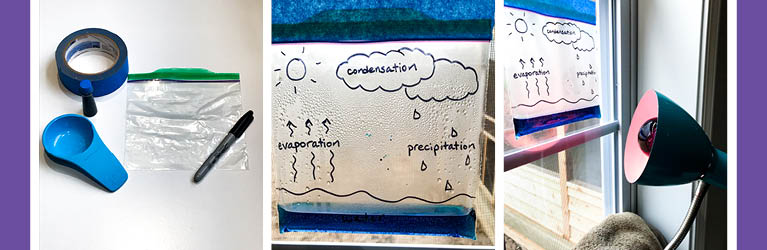
- A window, preferably one that receives some rays from the sun
- A resealable plastic bag, a quart size bag is a great size
- 1/4 cup of water
- Tape, really sticky stuff that can secure your bag to a window
- Marker (this is optional but helps a lot)
- Food coloring, this is also optional but food coloring does make things cooler
Here’s what to do:
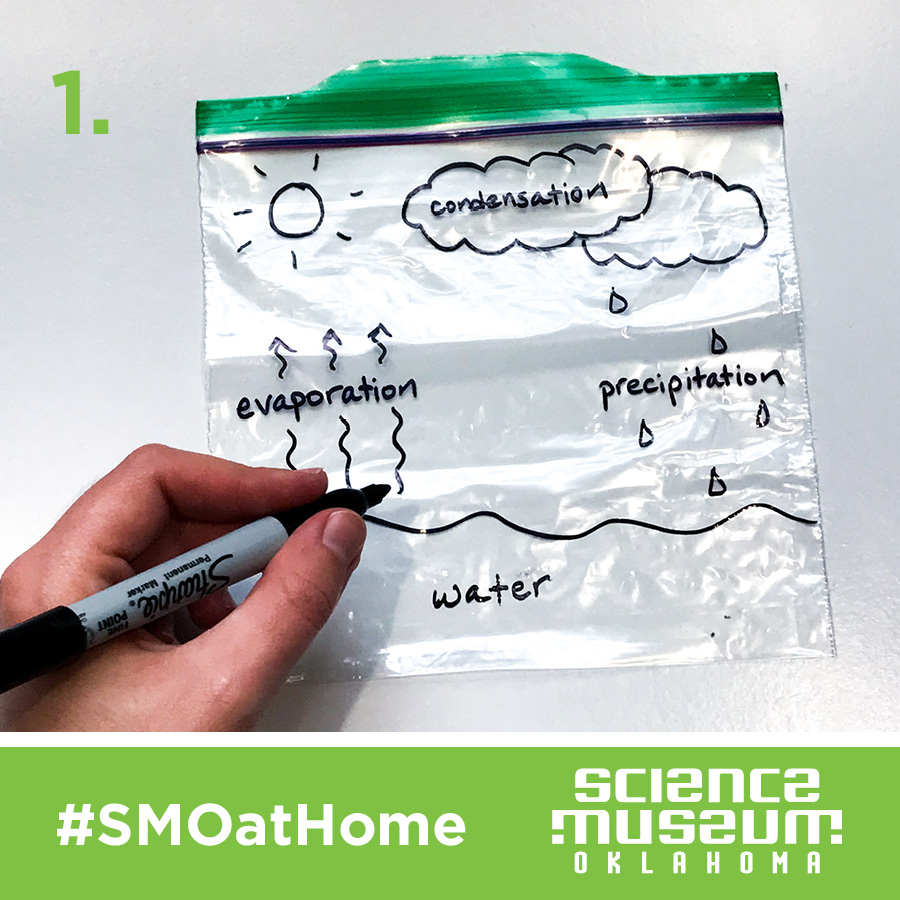
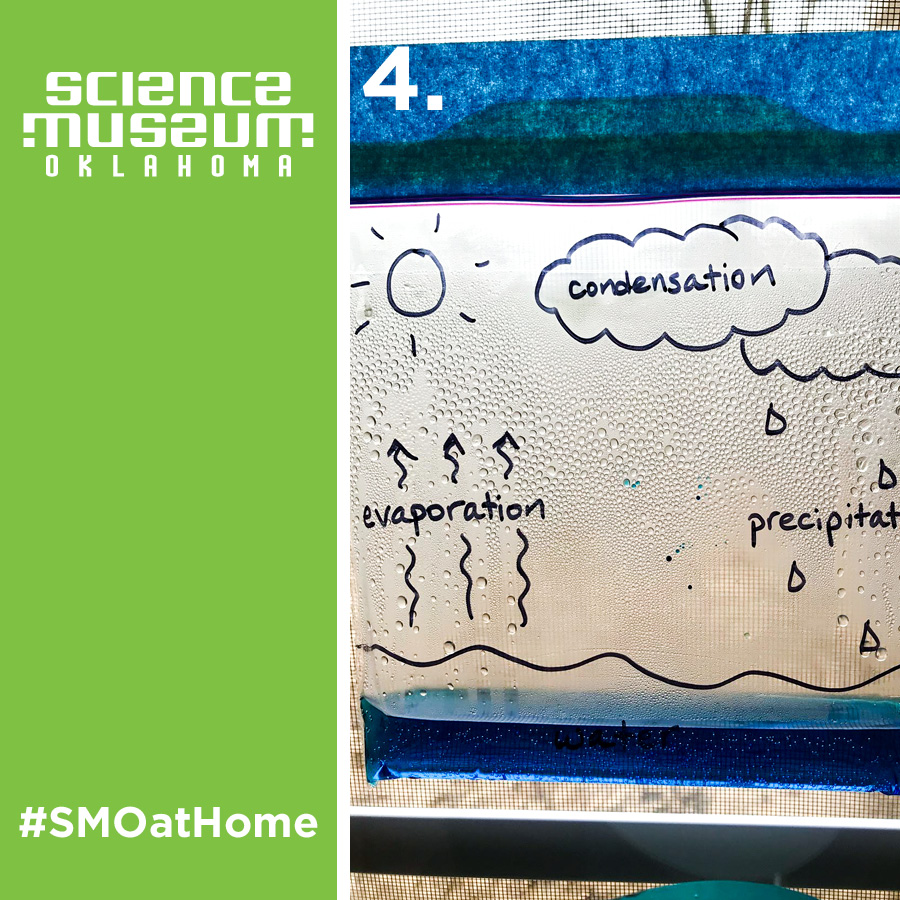
1. If you have a marker, draw the water cycle on the outside of your bag. The part of the bag that opens and closes should be the top of your drawing. Though this step is optional, it does help visualize what is going on. If you need a model of the water cycle, check out Emily’s video.
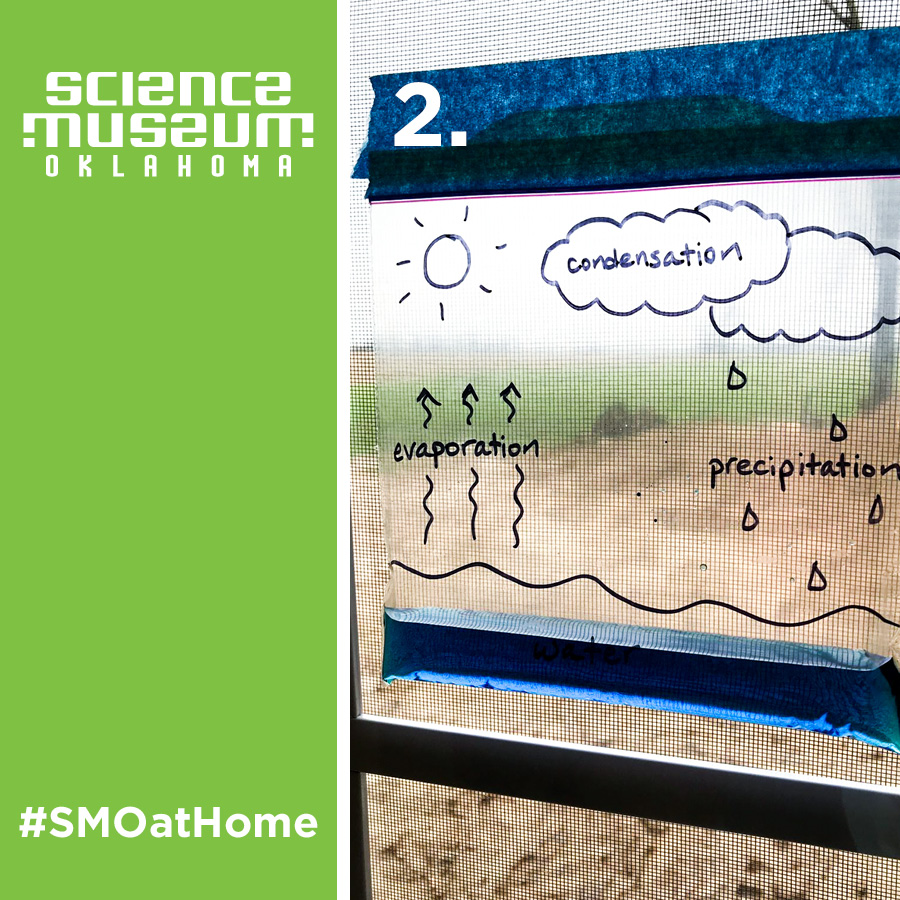
2. Pour 1/4 cup of water into your bag. You can add a couple of drops of food coloring if you got them. With water pooled at the bottom of your bag, what step of the water cycle would this be?
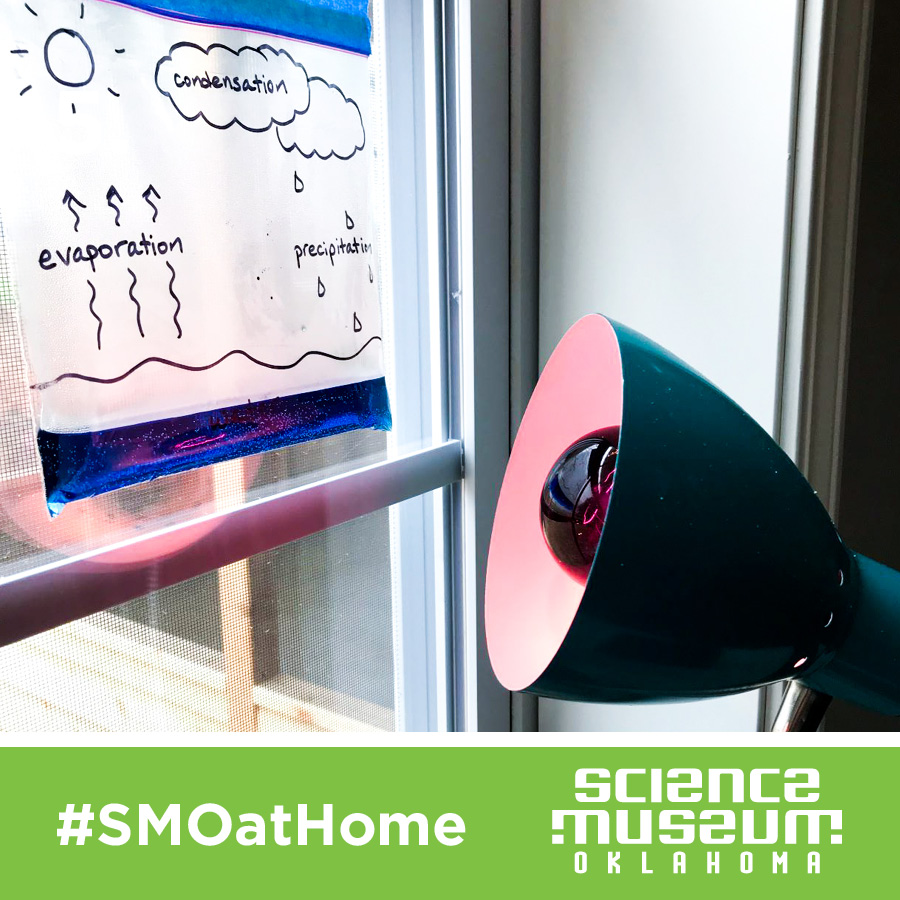
3. Hang your bag on a window using the tape. Try to select a place that gets direct sunlight!
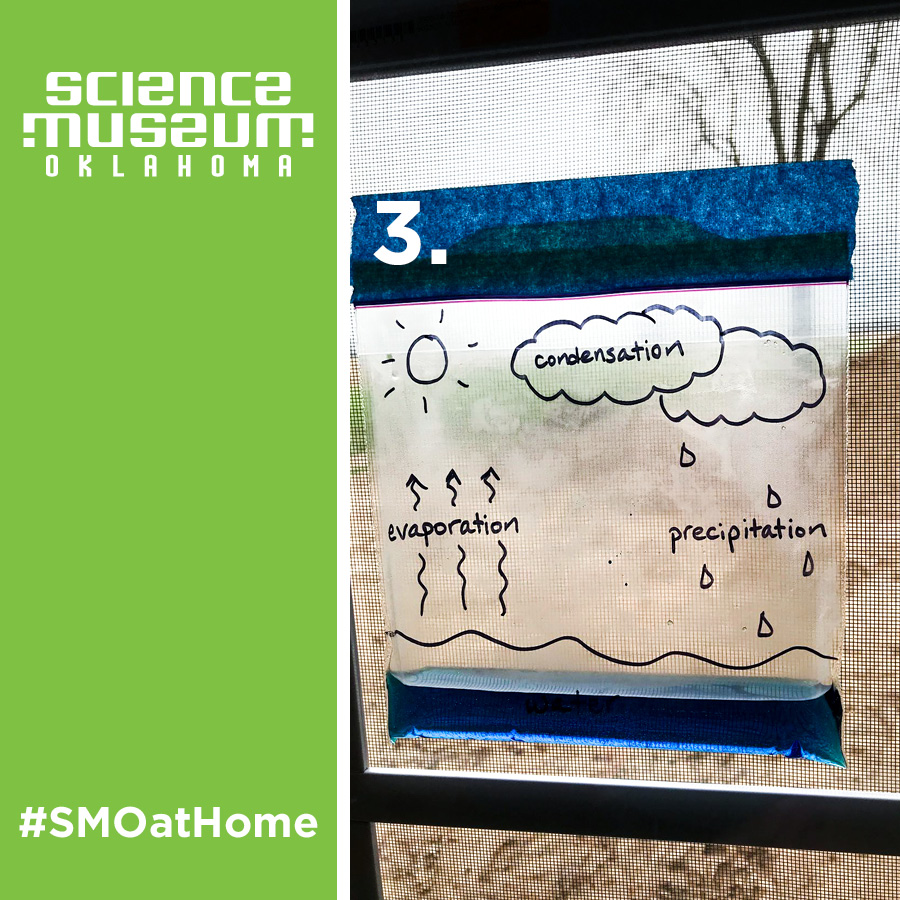
3. Leave your bag on the window for an hour.
4. After an hour, check back on the bag. What do you notice? Does there appear to be less water gathered at the bottom of the bag? What could cause this? Does it appear foggy in the bag? Do you detect any signs of condensation?
5. Keep monitoring the bag and making observations. What happens when water droplets form on the bag? Are the droplets big or tiny? What would happen if they got very big?
Through your observations, see if you can observe all four stages of the water cycle. There are lots of ways to further experiment with this exploration.
- Instead of using the heat from the sun, could you use an incandescent lightbulb?
- Would evaporation begin sooner if you started with warm or cool water?
- Does fresh or salt water evaporate faster?
- What would happen if you used a bigger or smaller bag?
- Could you still create a water cycle in a bag if you laid the bag flat on a table but still in the sun’s rays?